

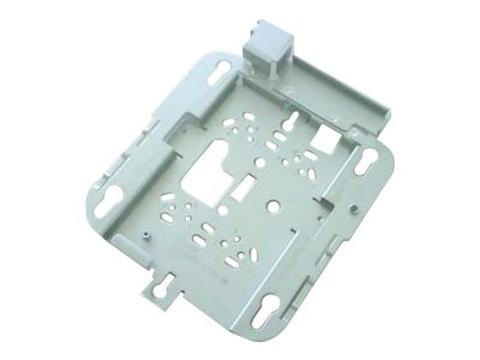

Cisco AIR-AP-BRACKET-2= Universal Mounting Bracket for 802.11N Access Points
Out of stock at PC LAN
Price checked today
We may earn a commission if you buy; it doesn't change your price. Check the price at PC LAN before you buy. How we make money
Price history
Tracking since today
The price hasn't changed since we started tracking it. We'll show its history once it does.
About this product
Cisco Universal Mounting Bracket for 802.11N Access Points [AIR-AP-BRACKET-2=]
Low-Profile Mounting Bracket Details
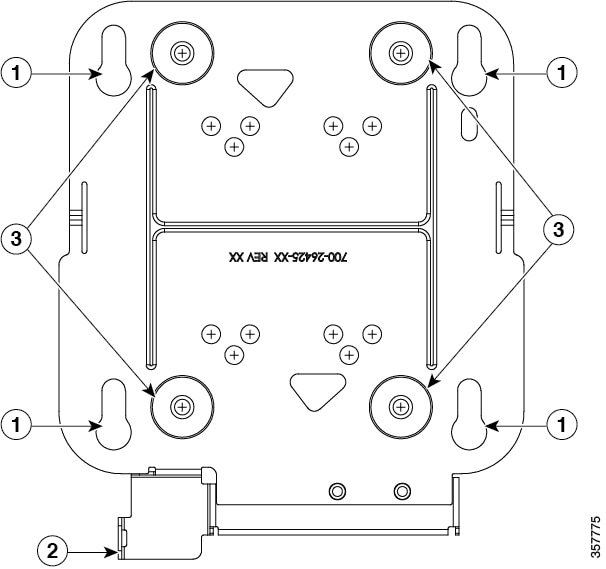
| 1 | Access point mounting keyholes |
| 2 | Security hasp |
| 3 | Hard surface mounting holes |
Universal Mounting Bracket Details
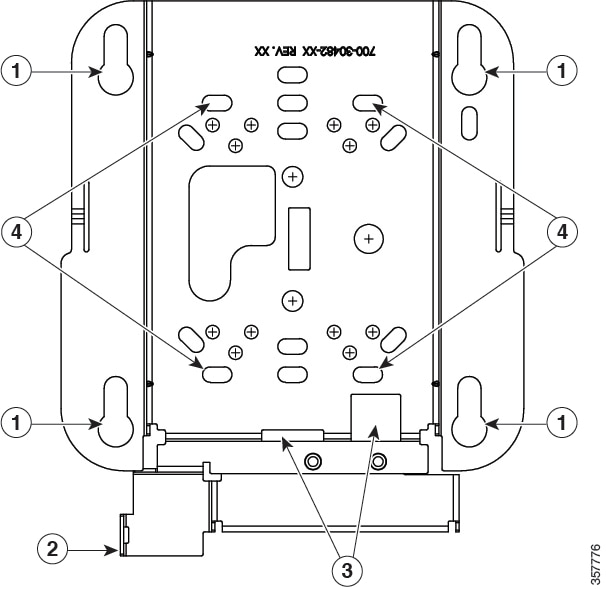
| 1 | Access point mounting keyholes | 3 | Cable access opening |
| 2 | Security hasp | 4 | Hard surface mounting holes |
Specifications
FEATURES
• Material: Carbon Steel, Zinc Plated
• 4 Drywall Anchors and 4 Screws
• Cisco network device mounting bracket
• Designed for Cisco Aironet 1040/1140/1260/3500/3600
WHAT'S INCLUDED
• 1 x Cisco AIR-AP-BRACKET-2= Universal Mounting Bracket
• Set of Screws
• User Guide
More Information
Mounting Brackets
The two most common mounting brackets are:
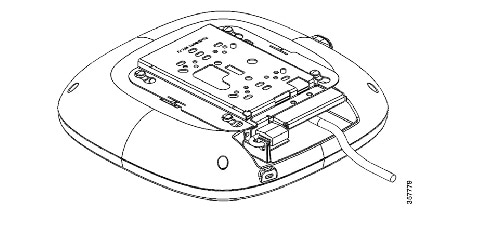
- The low-profile bracket (AIR-AP-BRACKET-1), provides a tight fit between the access point and the ceiling but does not accommodate network or electrical boxes or above ceiling mounts. Figure 1 shows the low-profile bracket installed on an access point.
- The universal bracket (AIR-AP-BRACKET-2) is versatile (it works with electrical boxes, can be used for wall mounting, and above ceiling installations) but leaves a significant gap between the mounting surface and the access point than the low-profile bracket. A substantial gap is necessary for some locations because it allows space for cable routing. shows the universal bracket installed on an access point.
Figure 1 Low-Profile Mounting Bracket Installed on an Access Point
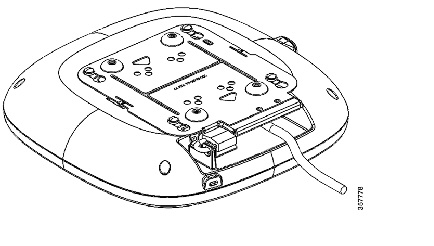
Figure 2 Universal Bracket Installed on an Access Point
Ceiling Grid Clips
You use a ceiling grid clip to mount an access point on a suspended ceiling. The ceiling tiles or rails will determine which clip best works for the installation. There are two types of ceiling grid clips:
- Ceiling Grid Clip, Recessed (AIR-AP-T-RAIL-R): If you have a recessed ceiling tile, this clip best fits between the AP and the ceiling.
- Ceiling Grid Clip, Flush (AIR-AP-T-RAIL-F): If you have a flat ceiling tile, this clip provides a snug fit between the AP and the ceiling.
For more details about the ceiling clips, see the Types of Ceiling Rails and Tiles section.
Figure 3 shows a ceiling grid clip.
Figure 3 Ceiling Grid Clip
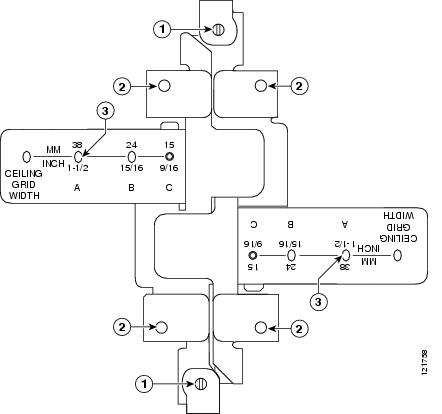
| 1 | Locking screws | 3 | T-rail width detents (A, B, or C) |
| 2 | Bracket screw holes |
Additional Adapters for Channel and Beam Ceiling Rails
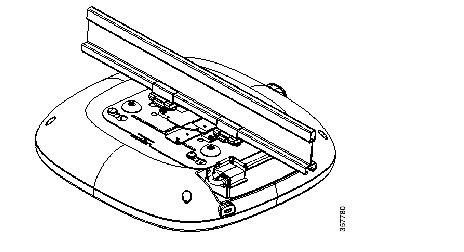
The T-rail is the most common type of ceiling rail (the supports for the ceiling tiles). You can attach a ceiling grid clip directly to a T-rail ceiling rail. However, other types of ceiling rails, such as channel rails and beam rails, require an additional adapter clip (AIR-CHNL-ADAPTER). You need two adapter clips for each access point. Set screws on the clips and hold them securely on the ceiling rail.
Figure 4 shows the three types of ceiling rails: T-rail, channel, and beam. Figure 5 shows an access point installed with a mounting bracket, ceiling grid clip, and adapter clips.
Figure 4 Ceiling Rails and Tiles
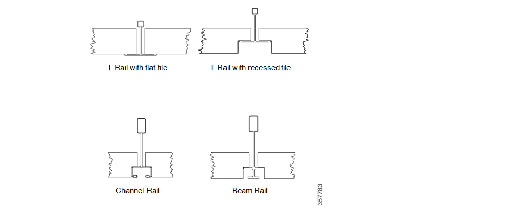
Figure 5 Adapter Clips Installed with Ceiling Grid Clips
Mounting an Access Point Below a Suspended Ceiling
Follow these steps to mount the access point below a standard or recessed, suspended ceiling. Figure 6 shows an access point mounted on a T-rail ceiling rail using a ceiling grid clip.
Figure 6 Suspended Ceiling Mounting Details
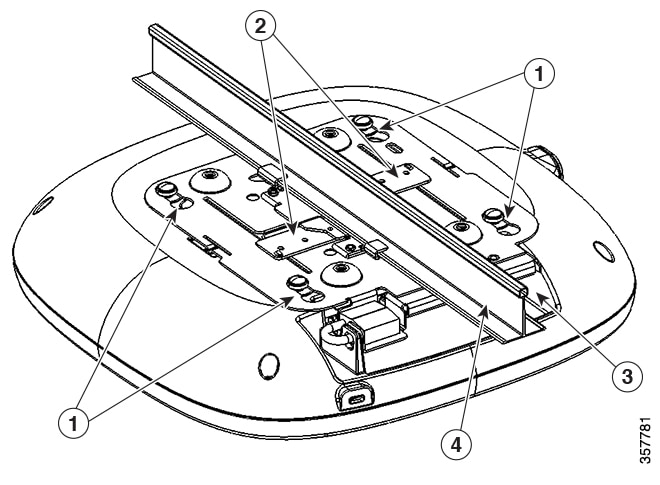
| 1 | Access point mounting keyhole | 3 | Access point cable access opening |
| 2 | Ceiling grid clip | 4 | Ceiling T-rail |